Choosing the Right Gaming PC Case
The gaming landscape has significantly evolved, and with it, the importance of selecting the right gaming pc case cannot be understated. A gaming case serves as the anchor for your builds, housing all components while ensuring optimal performance, airflow, and, ultimately, aesthetics. In this guide, we delve into the parameters that help you choose the right case, what features you should look for, and which brands dominate the market.
Understanding Case Sizes and Form Factors
The first consideration in selecting a gaming PC case is understanding the various sizes and form factors available. Cases are generally categorized into several sizes: Mini-ITX, Micro-ATX, ATX, and E-ATX. Each size supports different motherboard sizes and features varying capacity for components.
- Mini-ITX: These compact cases are ideal for builds where space is a constraint. They are often used in living room PCs or in setups where portability is needed.
- Micro-ATX: Slightly larger than Mini-ITX, Micro-ATX cases provide a balance between size and capacity, allowing for more expansion options.
- ATX: The standard form factor for most gaming builds. ATX cases offer ample room for multiple graphics cards, cooling systems, and storage options.
- E-ATX: These are the larger cases suitable for high-performance builds that require extensive cooling and multiple GPUs. E-ATX cases are often used by gamers who are into heavy gaming sessions or content creation.
Essential Features to Look For in a Gaming PC Case
Once you’ve determined the appropriate size, it’s crucial to consider specific features that enhance functionality and ease of use:
- Cooling Options: Look for cases that offer multiple cooling configurations, including support for both air and liquid cooling systems. Adequate airflow is essential for maintaining performance.
- Cable Management: A good case should have built-in cable management solutions. Organizing cables effectively not only improves airflow but also makes the machine look more polished.
- Drive Bays: Ensure there is ample space for both SSDs and HDDs. Some cases offer hot-swappable bays, which can be convenient for those who frequently change out drives.
- Expansion Slots: Depending on your future upgrade plans, check for sufficient PCIe slots to accommodate additional graphics cards or other expansion cards.
- Noise Dampening: Many cases come equipped with noise-dampening materials which can significantly reduce the sound produced by components.
Popular Brands and Their Offerings
When it comes to PC cases, several brands have established themselves as industry leaders:
- Corsair: Known for their innovative designs and exceptional cooling solutions. They offer a wide range, from compact cases to large towers, emphasizing aesthetics with RGB options.
- NZXT: Famous for their clean aesthetic and user-friendly designs. Their cases often benefit from features that simplify building and maintenance.
- Fractal Design: Their cases tend to lean towards minimalistic design while providing excellent build quality and airflow.
- Lian Li: This brand is revered for their all-aluminum cases, offering premium build quality with a focus on aesthetics and longevity.
Key Considerations for Cooling Systems
Cooling is paramount for any gaming build. Overheating can lead to thermal throttling, reducing performance, and even damaging components. This section examines various cooling options and how they can affect your gaming experience.
Importance of Airflow in a Gaming PC Case
Good airflow is the foundation of an effective cooling strategy. Cases designed with airflow in mind typically feature:
- Mesh Front Panels: These allow air to enter easily, keeping components cool without obstruction.
- Multiple Fan Mounts: Cases should accommodate enough fans to create a positive airflow environment, pushing hot air out and pulling cool air in.
- Direct Airflow Paths: Some gaming cases come designed with airflow channels, ensuring that air effectively reaches critical components such as the CPU and GPU.
Before finalizing your case purchase, research review scores and airflow benchmarks for the particular models you are considering.
Liquid Cooling vs. Air Cooling Solutions
Cooling options can generally be categorized into two camps: air cooling and liquid cooling. Each comes with its own set of advantages and disadvantages:
- Air Cooling:
- Pros: Generally more affordable, simpler to install, and requires less maintenance.
- Cons: Can be less efficient in terms of thermal performance compared to liquid cooling systems.
- Liquid Cooling:
- Pros: Better thermal performance, can add a unique look with custom loops, and usually quieter than air cooling solutions.
- Cons: More complex to install, can be expensive, and if not set up correctly, can lead to leaks and other issues.
Adding Aftermarket Fans for Better Performance
Even if the gaming PC case you select comes with built-in fans, upgrading to aftermarket fans can enhance performance significantly. Key factors to consider include:
- Fan Size: Ensure that your case supports the fan size you are looking to install (120mm is a standard size).
- Fan Speed: The performance of a fan is typically measured in RPM (revolutions per minute). Higher RPM means more cooling potential, but it may also produce more noise.
- Static Pressure vs. Airflow: High static pressure fans are better for cooling radiators and restrictive environments, while high airflow fans are ideal for general case cooling.
- RGB features: RGB fans not only provide cooling efficiency but also enhance your build’s visual appeal.
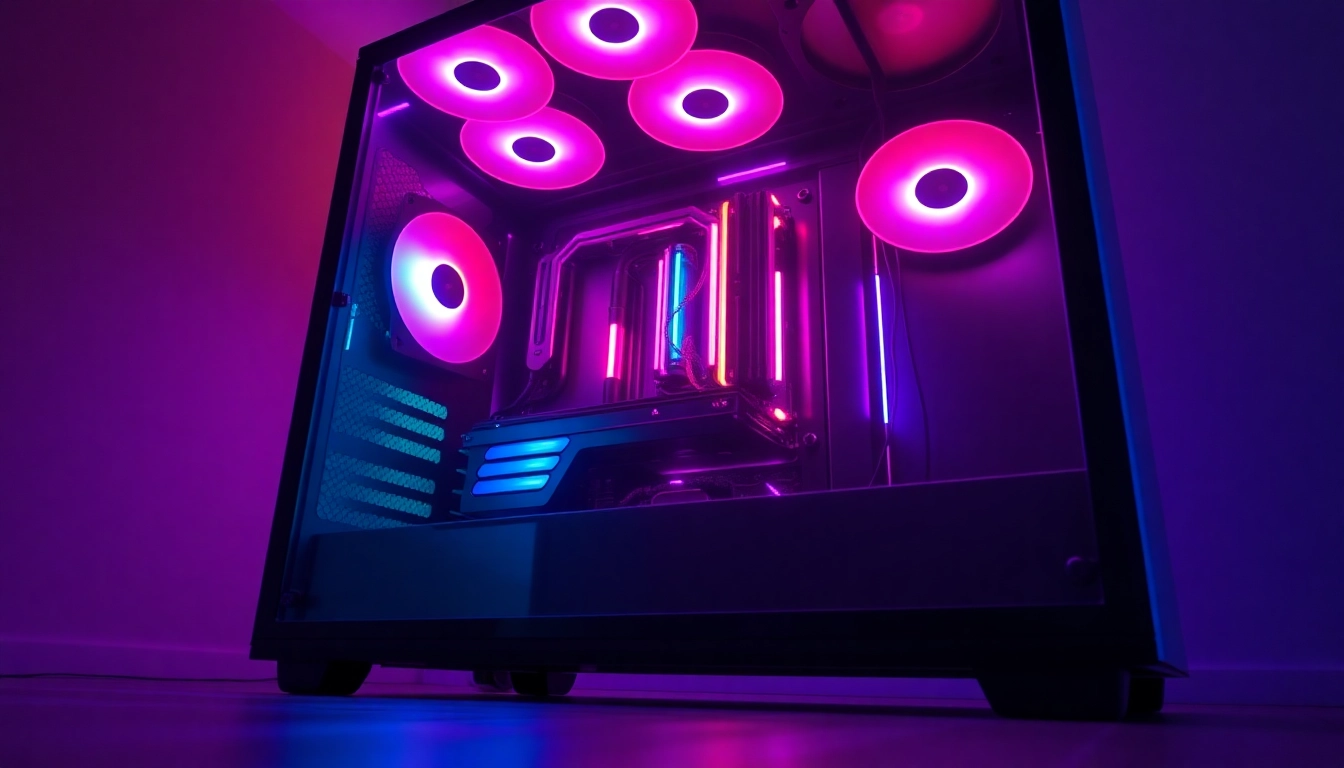
Visual Aesthetics and Customization Options
Your gaming PC case is a canvas where function meets form. The aesthetics play a significant role in the overall setup, especially in gaming environments where personalization is prized.
RGB Lighting and Its Importance in Gaming Builds
RGB lighting has become a staple in modern gaming builds, and its importance goes beyond looks. Here’s why you should consider adding RGB components to your case:
- Enhanced Visual Appeal: RGB lighting can make your build visually striking, elevating the overall aesthetic of your gaming setup.
- Mood Setting: Many use RGB lighting to create themes, corresponding lighting colors with the game being played.
- Synchronization: Many RGB devices can sync with your motherboard or software to create a cohesive lighting experience across your entire setup.
Tempered Glass vs. Metal Panels: Pros and Cons
The choice between tempered glass and metal panels is pivotal for your build’s aesthetics:
- Tempered Glass:
- Pros: Offers a premium look, showcases inner components, and often comes with a scratch-resistant surface.
- Cons: Can be heavier and is generally more prone to fingerprints and dust visibility.
- Metal Panels:
- Pros: More lightweight, often offers better durability, and may come with additional noise dampening qualities.
- Cons: Provides less visual appeal unless you opt for cases with elaborate designs or color choices.
Customization Tips for a Unique Build
Want your gaming PC case to stand out even more? Here are some customization & modification tips:
- Custom Paint Jobs: Consider painting the exterior of your case for a personalized touch.
- Decals and Stickers: Use decals to showcase your favorite games or brands.
- Custom Cooling Solutions: Explore options for custom liquid cooling loops, which can be both functional and decorative.
- Fan Arrangements: Experiment with fan placements; differing fan setups can change the airflow dynamics and visual impact.
Building Your Gaming PC: Step-by-Step
Once the right components are selected and purchased, the next step is assembling your gaming PC. Here’s a breakdown of the assembly process:
Preparing Your Gaming PC Case for Assembly
Before putting components into your case, perform the following prep work:
- Lay out all components nearby for easy access.
- Remove any protective films or stickers from the case and glass panels to avoid damage during assembly.
- Organize screws and tools for easy access.
- Check the placement of standoffs in the case, ensuring they match the motherboard schematic.
Installing Components Safely and Neatly
Follow these steps when installing your components:
- Motherboard: Begin by mounting the motherboard onto the standoffs using screws, ensuring that it is secured properly.
- CPU: Install the CPU according to the manufacturer’s instructions, ensuring proper alignment with the socket.
- RAM: Insert RAM sticks into the designated slots according to the motherboard’s manual for optimal performance.
- Storage Drive: Secure your SSDs or HDDs into their respective bays, making sure to connect power and SATA cables.
- GPU: Install the graphics card into the PCIe slot, securing it with screws for stability.
- Power Supply: Insert the power supply into its designated space and connect all power cables to the motherboard and components.
Final Touches for an Aesthetic Build
The final touches can elevate your build from functional to a work of art:
- Organize cables using zip ties or Velcro straps for a clean appearance.
- Ensure that fans are set in the proper direction: typically front-to-back for the intake and top-to-bottom for exhaust.
- Double-check all connections before powering on your build, ensuring nothing is loose.
- Once assembled, consider running airflow and temperature tests to confirm optimal performance.
Maintaining Your Gaming PC Case for Longevity
An often overlooked aspect of building a gaming PC is maintenance. Keeping your components clean and in good working condition can prolong the life of your gaming setup.
Effective Dust Management Techniques
Dust can clog fans and hinder airflow, leading to overheating. Here are some effective dust management strategies:
- Air Filters: Invest in cases that come with air filters to minimize dust ingress.
- Regular Cleaning: Schedule regular maintenance to clean dust buildup. Compressed air can be effective for removing dust from fans and heatsinks.
- Optimal Positioning: Place your PC setup in areas away from dust sources, such as carpets or windows.
When to Upgrade or Replace Your Case
As technology evolves, understanding when to upgrade or replace your case is essential. Here are signs that might indicate it’s time for an upgrade:
- The case no longer supports newer hardware due to size constraints.
- The cooling performance is insufficient for modern high-heat components.
- Physical damage or wear is affecting the aesthetics or functionality.
- Newer models offer significantly improved features that would enhance your build.
Cleaning Tips to Keep Your Setup Pristine
Consistency in maintenance results in a longer-lasting and visually appealing gaming setup. Here are some cleaning strategies:
- Exterior Wipe Down: Regularly wipe the outside surfaces of the case with a microfiber cloth to prevent dust buildup.
- Vent & Fan Cleaning: Schedule interior cleanings every few months, ensuring to clean vents and fans without removing them, if possible.
- Component Care: Periodically check and clean individual components like the GPU and CPU cooler, especially if you have a high dust environment.